(Sorry this is so long, tumblr won’t let me un-indent all the things without messing the hyperlinks up BLUH. So press J to skip.)
I just went back through over 900 liked posts and dug out all the art tutorials so i can keep track of them. I guess this might be helpful to some of you guys, so here you go.
Some of these were gutted from posts where the original was deleted and so can’t be linked to in the masterpost list – especially one by Tumblr user melkh who has since either deleted or changed their url, so props to them.
Here we go then!
Freeware
Alchemy – this is a really fun program. You play around making abstract shapes until you start to see something in them, kind of like a Rorschach test. Then you use the shapes as a base to draw it from. MyPaint – a pretty decent painting program that also has the benefit of working on Unix systems. openCanvas 1.1 – I haven’t used openCanvas in years but it was a nice program with a pretty unique feel to it. ArtRage – Only used this a couple of times donkey’s years ago just before I got oC, but I’ve heard good things about it. The GIMP – In a similar vein to Photoshop, but free. I couldn’t get on with it when I tried it out a few years ago, but it’s pretty popular and is available on Unix systems and Macs.
Not-free-ware
Photoshop – Standard painting fare. Probably the most flexible program (particularly the latest versions) but not designed to act in a “natural” way. If you’ve used it for painting versus something like Painter you know what I mean. Who the fuck pays for it though? Google “Photoshop tumblr masterpost” and take your pick. Paint Tool Sai – Far more affordable and definitely worth paying for if you can. The brushes are very decent (especially when they’ve been tweaked a little), the gui is simple and intuitive, and I dare you to find a program with which making smooth lineart is easier. Corel Painter – My program of choice for most things. More tools than you could ever possibly use and pretty cheap on a student license, providing that you can prove you’re a student! It’s got a few bugs but if you want realism or a more natural feel than PS or SAI this is the program for you.
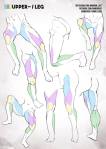
All the basics you need to begin learning to draw and think visually like an artist from a starter level!
Note: Feel free to leave suggestions as there may still be topics left uncovered, since art is such a wide subject the list could go on for miles so I’ve chosen what I see as the most basic fundamentals
Drawing basic facial expressions is not the hardest. Most people can draw a sad face, a happy face, angry etc., but making more multidimensional expressions is more of a challenge. I have gotten a lot of compliments on how I draw facial expressions, (specifically “angsty ones”) telling me that they are very dramatic and well… expressive! And there are actually only a few things I think about when I draw faces that take them to the next level, so I thought i’d illustrate them all here!
SUPER IMPORTANT TIP BEFORE WE START: Look at your own face when you draw faces. Even making the face when you are drawing (you don’t even have to look at it), will give you some sense of how the face muscles pull and where things fold and stretch, because you can feel it. You are the best reference when it comes to facial expressions!
Angles
Draw the head in an angle that matches the expressions you want to make. It is not a requirement, but is going to add to the effect.
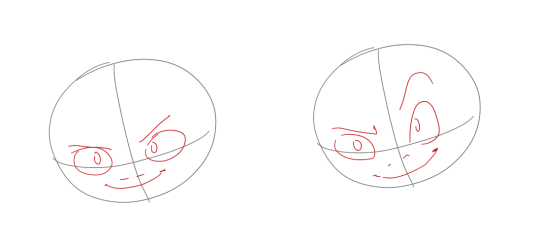
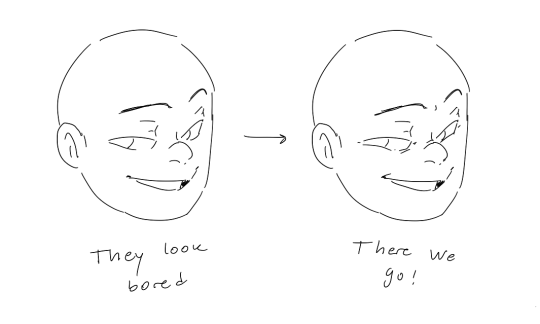
Symmetry vs asymmetry
A face is rarely symmetric. Unless the face the character is making is 100 % relaxed or even dissociating, the eyebrows, mouth and facial muscles will have different placements of their respective side. This image shows the dramatic impact asymmetry has on a face:
That’s the difference between a smile and a smirk!
The first one’s like “oh yeah?” and the second is like “oH YEAH??”
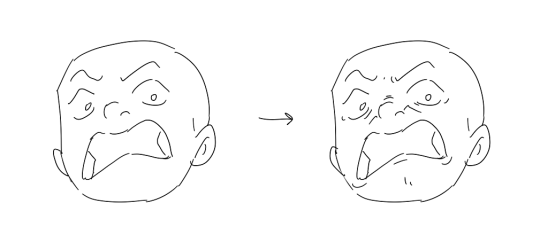
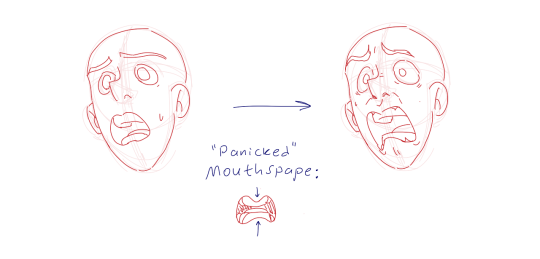
The “balloon squishing principle”
This is something I did subconsciously, and I didn’t know about until I made this tutorial. And this principle goes hand in hand with an asymmetric face. Basically, if you squish one part of the face, you need to even out the empty space by “inflating” the other part of the face so that it doesn’t appear shrunken. The picture hopefully explains it:
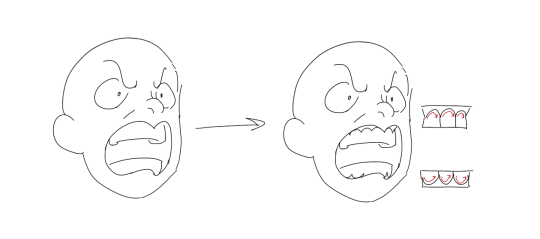
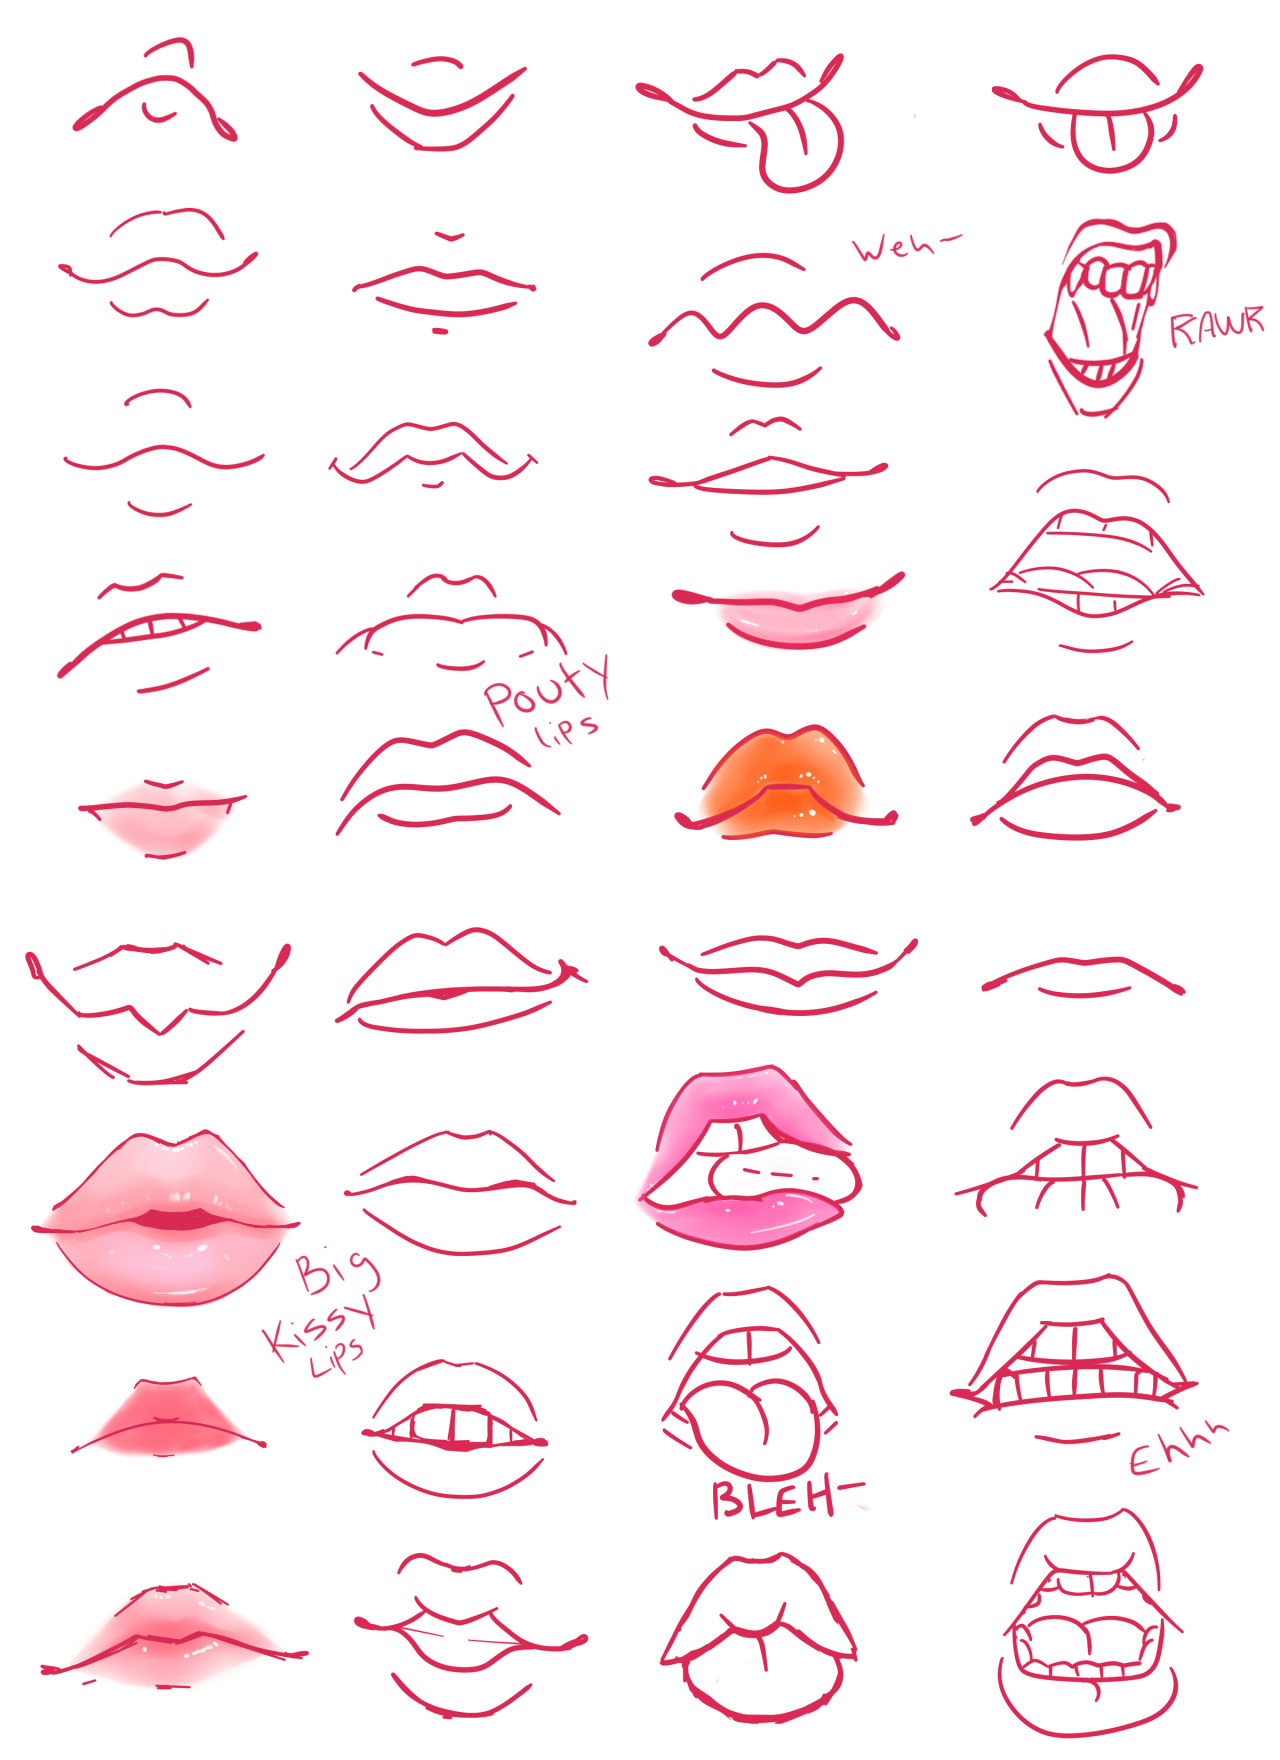
Teeth
Don’t forget to add the gum when the mouth is open to its full potential!
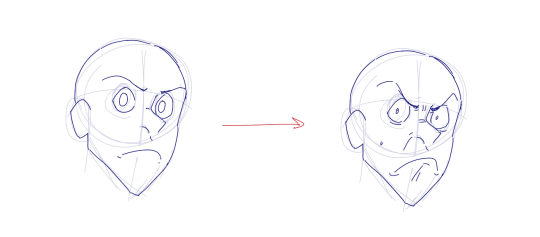
Squinting and folding
Adding folds around the eyes when a character is squinting makes a HUGE difference. It makes a smile more genuine and a growl more intimidating. Adding folds to the face in general makes your characters more lifelike and ‘visually relatable’. Like, they look human, and less plastic or fake.
and so on..
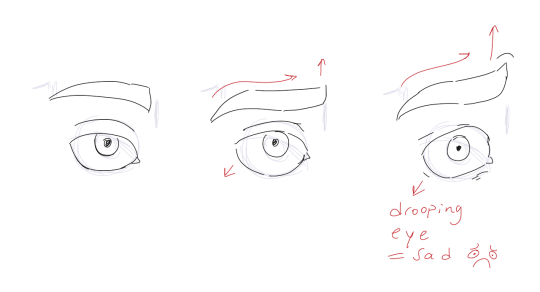
Pupils and irises
The placement of the iris and pupil in relation to the eyelids is very important! The less of the white you see, the more relaxed the character is.
And then of course eyebrows and eyes go hand in hand!
Gestures, spitting, sweating…
Adding more elements than just a face is key to making the character actually look like they are feeling what you want them to feel. Just the tiniest sweat drop adds to their anxiety, spitting adds frustration to their rage, slouching shoulders, waving hands, a double chin, extreme angles, the list goes on! Add whatever and see what kind of impact it makes! Does it do the trick? Great! Add it!
Over exaggeration!!
Remember that you can almost always exaggerate more. Don’t be afraid to do draw “too much” because you’re just experimenting. See what works and what doesn’t. What do you like to exaggerate?
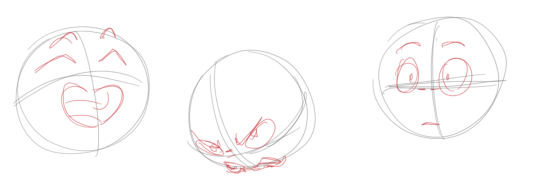
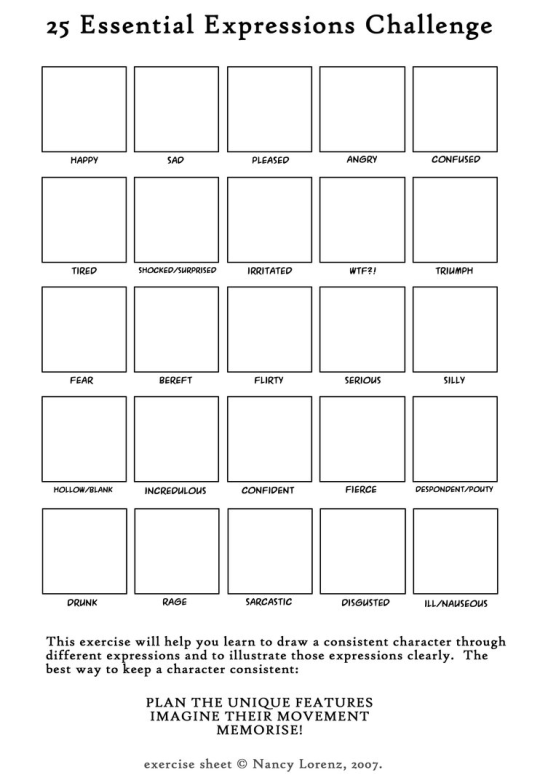
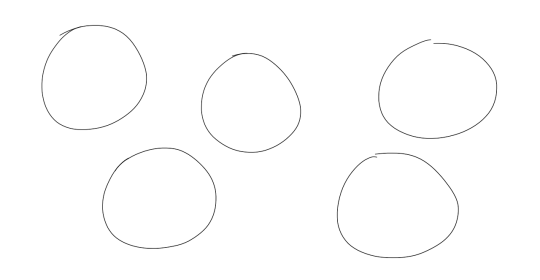
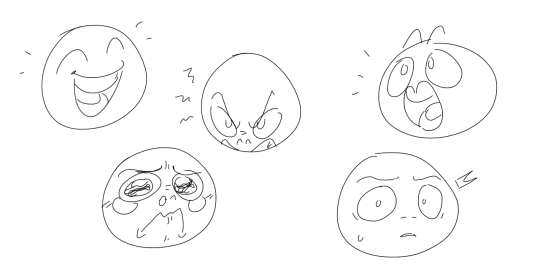
Now that you know some theory, it’s time to practice!
Fill a page with circles and fill them in with different expressions. Try and exaggerate as much as you can!
This is mostly for experimenting. They are quicker to draw than complete faces, but the same rules should apply!
And that’s about it!
I don’t know if I covered everything in this tutorial, since some things might be obvious for me, and this post perhaps only scratches the surface. So feel free to send me a message if you want an explanation about something more in depth! Thank you for reading! And now DRAW!!! ✨🎨
👏👏👏
Wonderfully detailed guide on drawing facial expressions. definitely go and follow @elvirasteckningar!
THANK YOU!! ❤ I’m always very bad in explaining what I’m doing. Cause there is just a lot of trying and painting over it and mashing and mixing colors until I feel it’s good. So I tried to show you. I hope this helps!
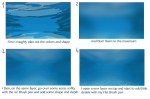
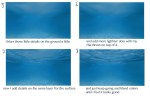
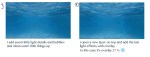
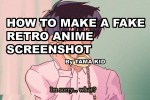
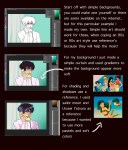
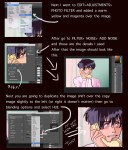
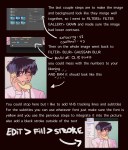
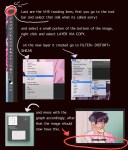
I got a lot of asks about this so I made a tutorial on how I was able to emulate the 80s aesthetic, please keep in mind I’m not an expert and what I put here is just what I personally did. I hope you guys like it and hope it helps
go crazy kids
An important contribution that I didn’t know I needed. Thank you!
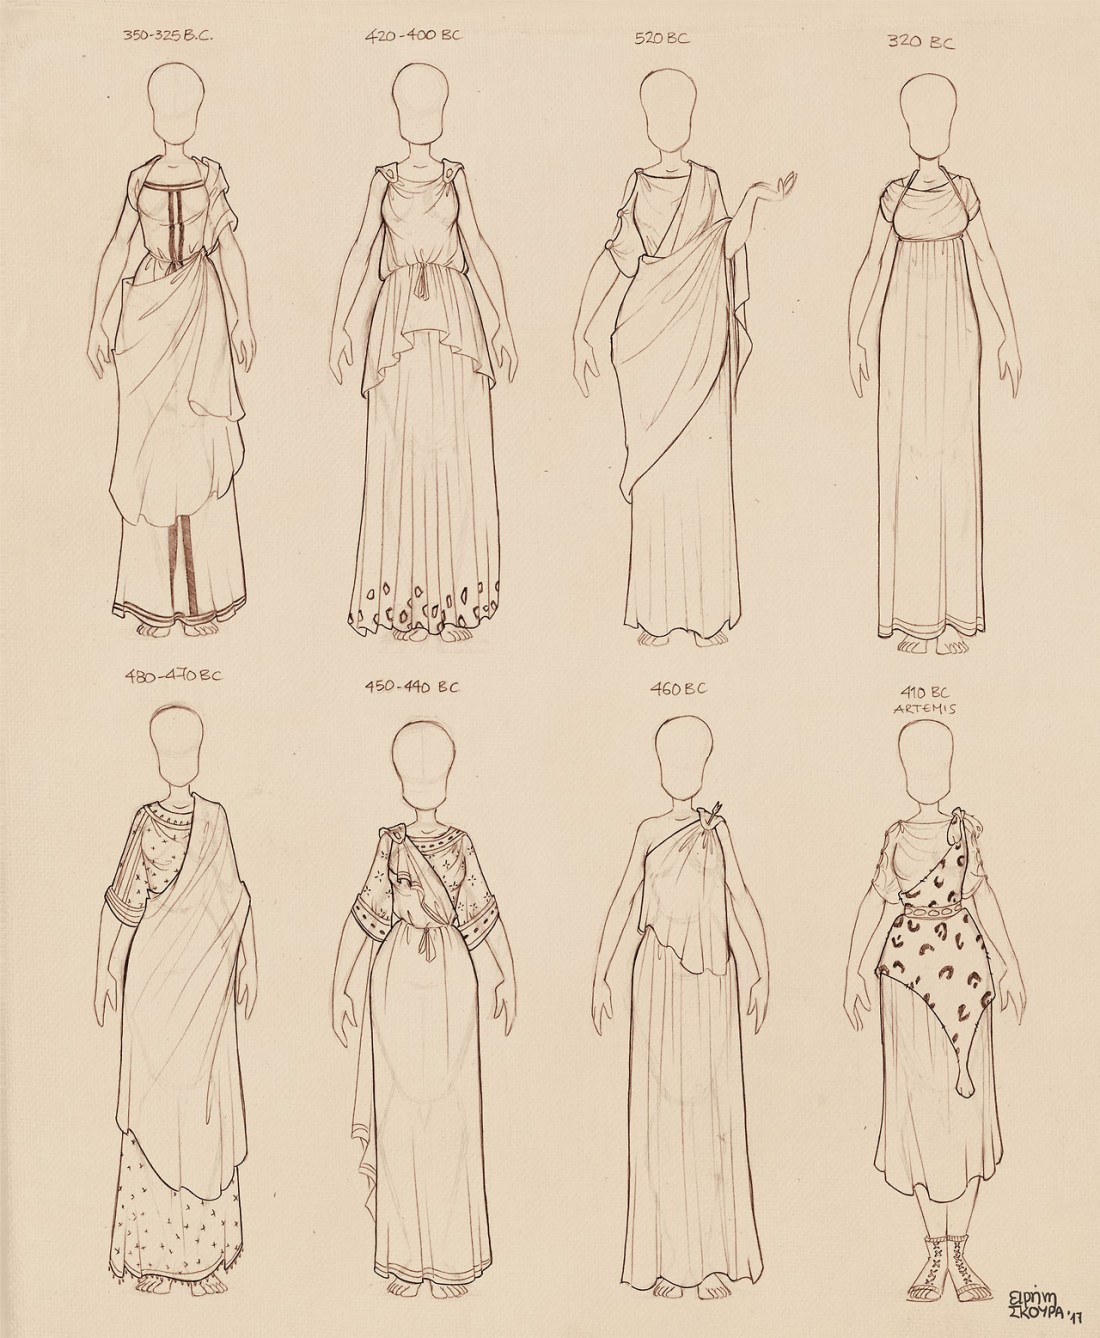
Here are some doodles of ancient Greek dresses I did for my own reference library
All these are drawn off original vases of the era written above each, so feel free to use them as reference! Enjoy and let me know me if you find them useful!


